Solo #3 ratchets up the tension as Han and Beckett cut a deal with Dryden Vos to save their hides after the disaster with the conveyex.
This article contains plot points for Solo #3.

Solo #3
Writer: Robbie Thompson | Artist: Will Sliney | Colorist: Federico Blee, Stefani Renee, Andres Mossa | Letterer: VC’s Clayton Cowles | Cover Artist: Phil Noto | Assistant Editor: Tom Groneman | Editor: Mark Paniccia
The adaptation of Solo: A Star Wars Story continues with Solo #3. Fresh off their disastrous heist of the conveyex on Vandor, Han, Chewbacca, and Beckett made their way to Dryden’s yacht. To Han’s surprise, Qi’ra finds him there. The unexpected reunion is short lived and Han and Beckett are negotiating for their lives as they seek to undue their failure in Solo #3.
Qi’ra’s Dark Past
Solo #3 begins with a flashback to Qi’ra’s past. The reader finds Qi’ra on Corellia shortly after Moloch and the White Worms captured her at the spaceport. She is in their custody for a limited time until the White Worms sell her to Dryden. From there, in the space of a handful of panels, Qi’ra receives training in Teräs Käsi and becomes a member of Crimson Dawn. Later, Qi’ra heeds Dryden’s advice and direction and kills the helpless slaver that sold her in apparent cold blood.
Mur Lafferty referenced Qi’ra’s past in the novel adaptation of Solo: A Star Wars Story. So, this isn’t brand new material, but it is material cut from the film. Although Lafferty beautifully described Qi’ra’s circumstances, Robbie Thompson’s take is also well-written and succinct. In the space of six panels, readers clearly understand what Qi’ra tried to tell Han in the film. She did what she had to do, and Han wouldn’t understand her past. This is what makes the adaptation great. These scenes might have been hard to work into the film, and they would have been lengthy. However, their import comes across clearly and quickly in a comic.

The Negotiations
Han and Qi’ra’s reunion is cut short by Beckett. He was unaware that Qi’ra was the girl Han was talking about at the previous night’s campfire. Before, they can get into this further, Drydren arrives. Dryden is every bit the bipolar character that Paul Bettany portrayed him as in the movie. One moment he is greeting Beckett and consoling him over the loss of Val. Then he is warmly greeting Han and Chewbacca. The next moment he is on the verge of killing them all for failing with the heist of the coaxium. Shortly thereafter, he is eager for them to make their run to Kessel.
Will Sliney’s work in illustrating Dryden is noteworthy. Dryden displays a wide range of emotions, and each of them come across the page clearly. Anger, thoughtfulness, rage, and sumpathy – they are all there. Sliney’s art for Beckett, Han, and Qi’ra also shines here.
Overall, Solo #3 does a great job capturing the pace and tension of this scene from the film. The pacing is spot on. Altering the frame between the actors works really well as the negotiations carefully and urgently unfold.
The Sabacc Game
Ultimately, the negotiation between Dryden and Beckett and Han works itself out. They will go to Kessel and steal the unrefined coaxium. However, they need a really fast ship. Qi’ra knows a guy. So, they head to Fort Ypso and seek out Lando. They find him holding court at the Sabacc table. Han convinces Qi’ra to stake him in a game, and Han sits down with the goal of winning the Millennium Falcon.
As with the negotiation scene, Solo #3 does a great job capturing the tone of the scene from the film. Han and Lando cautiously feel each other out as they alternate winning hands of Sabacc. Han feigns inexperience while building up a large collection of chips. It all comes down to a final hand when Han raises the stakes and bets a fictious ship. Of course, as in the film, Lando cheats and takes the pot.
This scene is also well paced. Thompson and Sliney combine their talents and give a great back and forth between Han and Lando as they bluff each other and increase the stakes. They do a great job of capturing the spirit of the film.

Final Thoughts on Solo #3
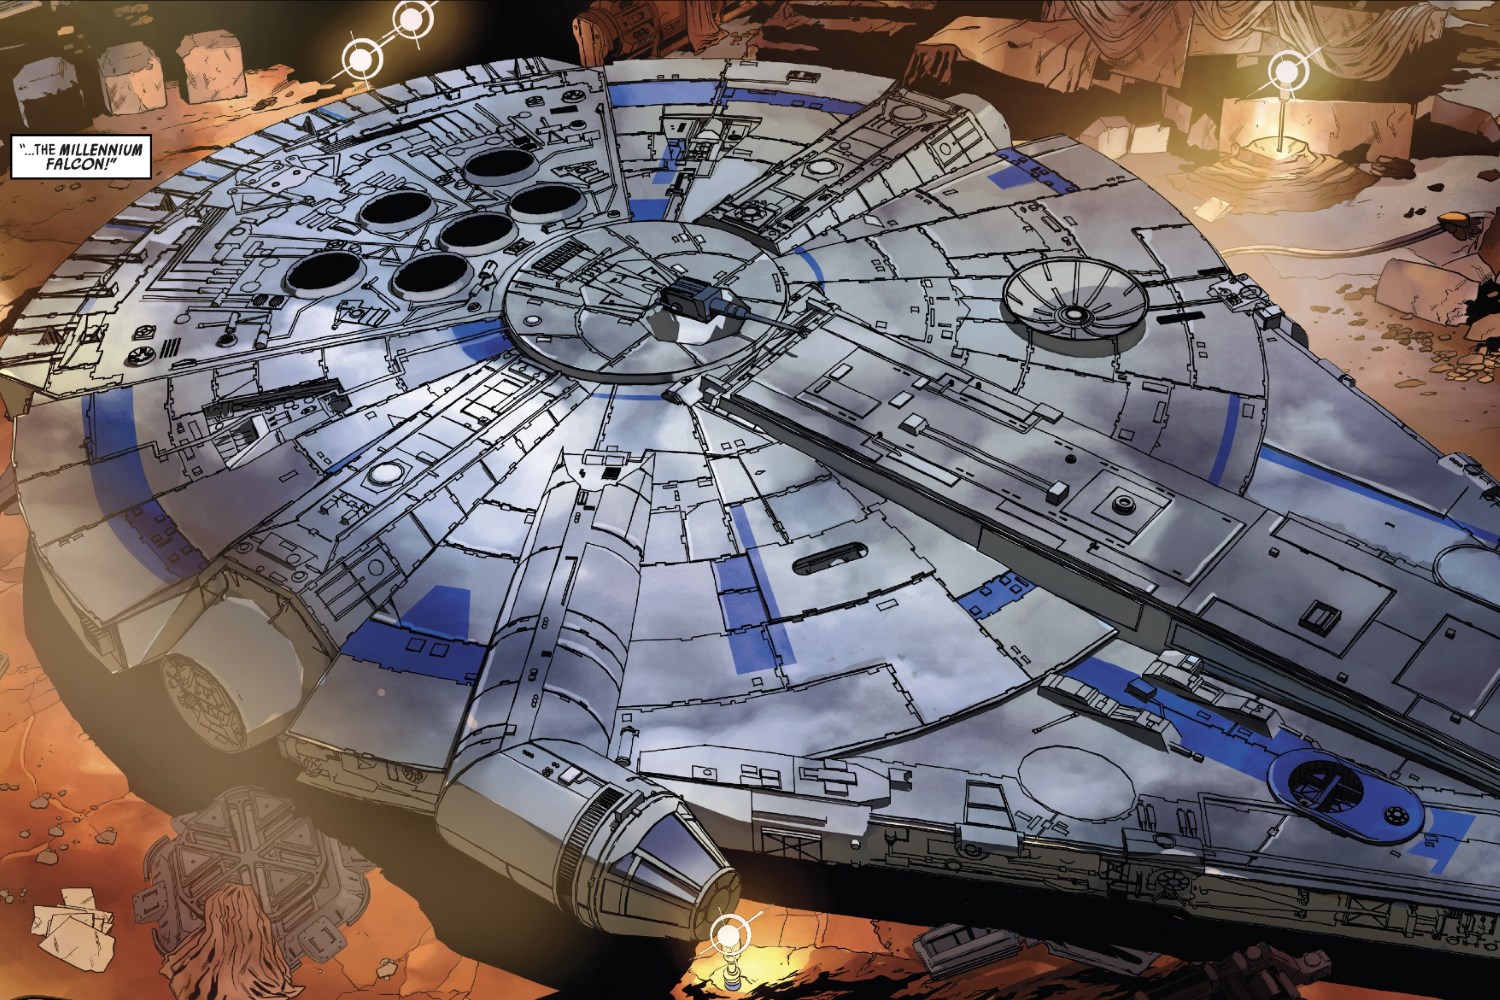
Solo #3 does a wonderful job capturing the spirit of the film without resorting to a shot-by-shot retelling of the movie. Although it might not add as much additional material as readers might want, the introductory scenes featuring Qi’ra were well done. They enhance the story of the film. Solo #3 also introduced L3-37 and the Millennium Falcon to the series. Neither received a lot of space in the issue (although the Falcon was introduced in a two-page spread). Of the two, L3-37 seems a little forgotten, but she should receive plenty of time in the next issue. The Solo adaptation is an excellent companion to not only the film, but the Lando: Double or Nothing series and Beckett one shot.
Dennis Keithly is a graduate of the University of Missouri, North Texas attorney, husband, father of two, and co-host of Starships, Sabers, and Scoundrels. In addition to Star Wars, Dennis is a fan of science fiction, fantasy, and super heroes in general. When not engaged in fictional universes, Dennis is reading a good book or watching the NHL, football, or studying the NFL draft.