Leia, Luke, and Han steal a starship, but for what purpose?
Warning: This article contains spoilers for Star Wars #22.

Star Wars #22
Writer: Jason Aaron | Artist: Jorge Molina | Colorist: Matt Milla | Letterer: VC’s Joe Caramagna | Cover Artist: Mike Deodato & Frank Martin
The Heist
Star Wars #22 is part two of The Last Flight of the Harbinger. Part one featured Sergeant Kreel and Task Force 99, an elite commando unit of Stormtroopers. The Harbinger was absent from that issue. However, this Imperial Star Destroyer plays a central role in part two. In fact, the Rebels attack the vessel in the first panel of this issue. What at first appears to be an attack is revealed to be a heist. Han, Luke, and Leia lead a team of Rebels, including Chewbacca and Sana, that infiltrate the Harbinger. In a daring move, they cause an override in the ship’s reactor and jettison it just in time before it explodes and seemingly destroys the ship, and the Rebels, with it. However, the reactor overload was a distraction. Its primary goal was to induce the Imperials to abandon ship. The secondary goal involved using the explosion as cover to slip away from the Imperials. The mission was successful, and the Rebels have themselves a Star Destroyer.

A Tight Fit
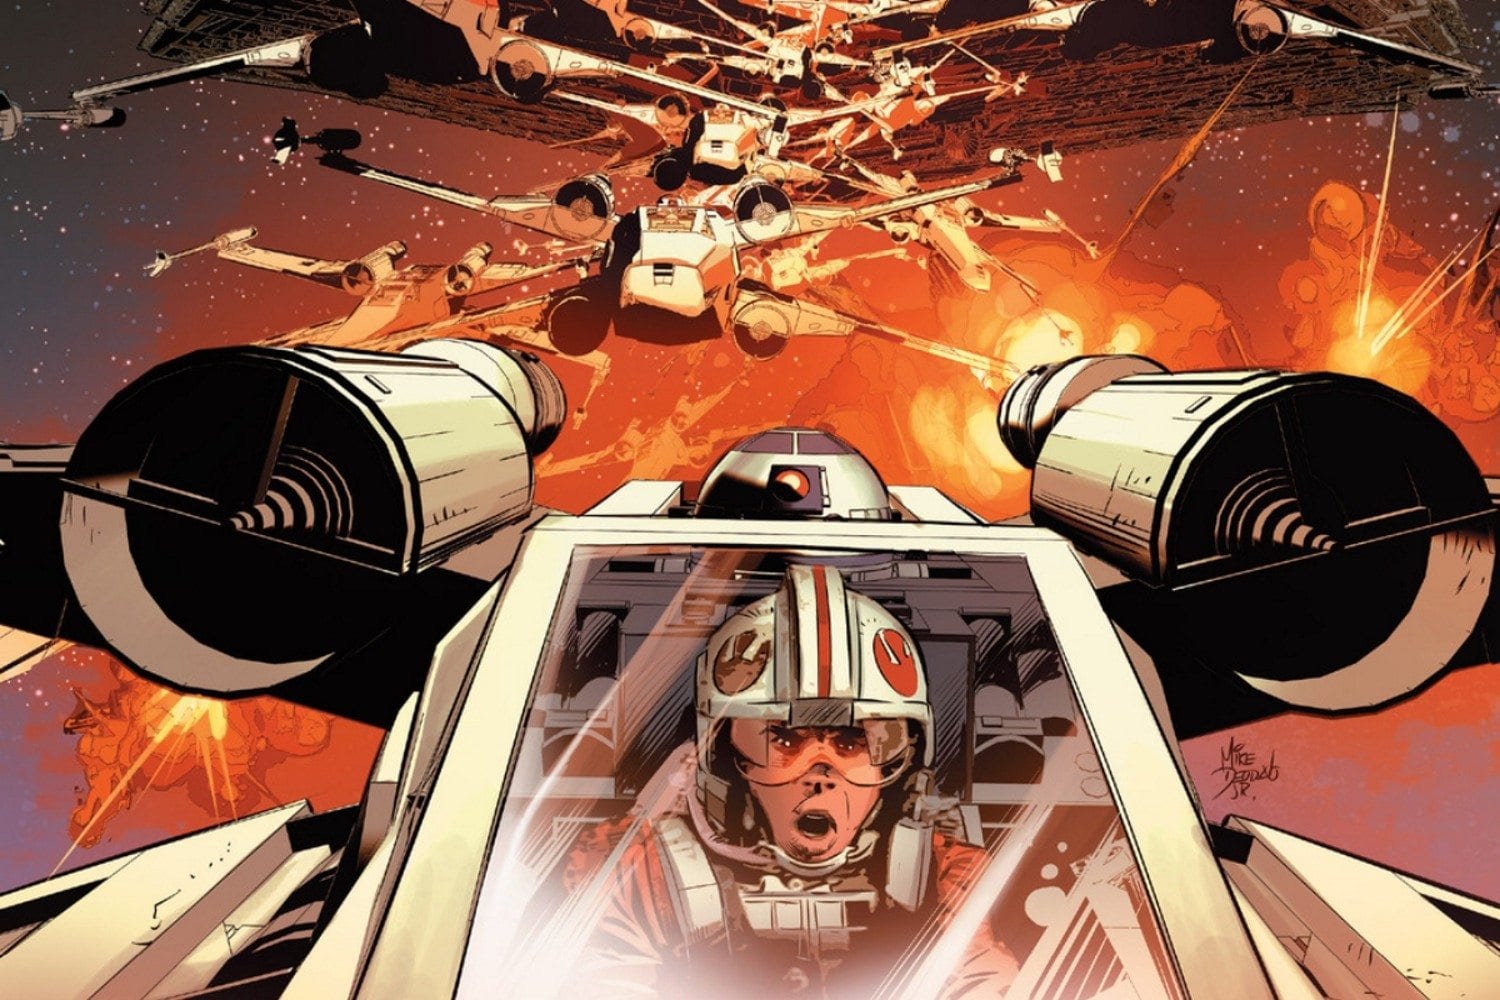
Turns out, overloading the reactor of a Star Destroyer isn’t easy. In fact, it’s nearly as complicated as overloading the reactor of the Death Star. First, the Millennium Falcon must score a precise hit to the aft section of the Star Destroyer. This is no easy task. Leia misses on her first attempt. Of course, this leads to a lot of arguing with Han and plenty of insults by both. However, Leia makes her second shot. A large hole is created in the aft section of the Star Destroyer. Next, a Rebel flying an X-Wing must successfully fire a pair of proton torpedoes through the resulting hole. Wedge Antilles, flying as Red Three, makes the first attempt. At first, it appears that Wedge successfully delivers the torpedoes. Alas, they fail to find their mark.
Therefore, Luke Skywalker must do what he does best: fly an X-Wing down a narrow corridor or trench and blow something up with his torpedoes. Sound familiar? Luke has a few advantages this time. For one, Darth Vader is not in pursuit. Second, he has done this before. Experience counts for something. He doesn’t need to be told by Obi-Wan to turn off the targeting computer and make the shot. He just does it. Even Han Solo is pleading with him to “use the Force and make your crazy, impossible shot and let’s call it a day.” The disadvantage with this attempt is that Luke seems to have less room than he did in the trench on the first Death Star. Regardless, he makes the shot, overloads the reactor, and then he and R2-D2 secure the reactor.
Although this scene was complex, it was well illustrated and written. Aaron successfully built up intrigue during the battle. Of course, there was nothing really to fear for the heroes. Everyone knows they survive this battle. That said, the engagement between the X-Wings and the TIE Fighters was fun to see. Molina did an excellent job illustrating the combat.
 The Obligatory Han and Leia Bickering Panel
At least one thing is for certain when Han and Leia are in a room together. They will bicker and argue. Leia makes a pronouncement. Then Han reacts brashly and loudly. Insults, both large and small, are exchanged. Almost always, featured in the middle of the argument, will be a panel of Leia and Han arguing. Han leans toward Leia, typically with a thumb pointed at himself or a finger pointed at Leia. The Princess stands her ground with a look of concentration, anger, or disgust. You can almost always count on this panel when these two work together. This issue is no exception. It is almost something of a cliché. It would be refreshing if they found a new way to communicate or argue.

Molina’s Depiction of the Big Three
This was Jorge Molina’s second issue as the lead artist for Star Wars. However, it was his first issue that featured the classic heroes. It is always interesting to see how Luke, Han, and Leia turn out with a new artist. Molina’s depiction of these heroes is not as realistic as some others. Despite that, there is no mistaking who Luke, Han, and Leia are. For one, Molina successfully takes advantage of notable traits of these characters. Han wears his traditional smuggler’s garb complete with vest, open collared shirt, and blue pants. Leia sports one of her many trademark hair styles and a blue vest that is similar to what she will later wear on Hoth. Luke, fresh from his X-Wing, wears a traditional X-Wing flight suit. That coupled with his usual 70’s hairstyle makes him easy to pick out in a panel. In short, nobody would mistake the depiction of these characters as portraits of Harrison Ford, Carrie Fisher, and Mark Hamill. But, nobody would not be able to tell who they are supposed to be. The likeness captures the essence of the characters, and they look good. In addition, the likeness is close enough without being distracting.

Conclusion
The Rebels successfully obtained a Star Destroyer. What they plan to do with it remains an open question. Leia offers a hint. She proclaims they plan to “ram it down [the Empire’s] throats.” Luke offers more hints while breaking up an argument between Han and Leia. They know what awaits them whenever they manage to finish repairs and get the ship “to where they are going.” It doesn’t sound like they have long term plans for this vessel. Plus, don’t forget, Sergeant Kreel and the Stormtrooprs weren’t introduced in part one of this story for nothing.
 Star Wars #22 Favorite Panel
As the Imperials abandon the Harbinger in their shuttles, the Admiral receives a communication from Darth Vader wishing to speak with him personally. The Admiral knows what this means. With surprising politeness, the Admiral asks to borrow a subordinate’s blaster. Presumably, he plans to dispatch himself rather than face Darth Vader’s wrath. This is the favorite panel in Star Wars #22 for a couple of reasons. First, the panel cements Darth Vader’s reputation. In other stories, Imperial officers that failed in their missions attempted to explain their failures. Usually, those officers fail to survive the telling of their explanation. Second, the Admiral displayed an unusual amount of calm and politeness in the face of certain death. The Admiral displayed a fair amount of hubris when the Rebels attacked earlier. He didn’t understand their plan. Now, he goes to his death with some dignity. This panel says a lot.

Star Wars #22
Dennis Keithly is a graduate of the University of Missouri, North Texas attorney, husband, father of two, and co-host of Starships, Sabers, and Scoundrels. In addition to Star Wars, Dennis is a fan of science fiction, fantasy, and super heroes in general. When not engaged in fictional universes, Dennis is reading a good book or watching the NHL, football, or studying the NFL draft.